---
title: How to Integrate Sertifier and Pabbly Connect
description: (Example integration with Google Sheets) A few step guide on how to Integrate Sertifier and Google Sheets on Pabbly Connect.
---
[Skip to content](https://help.sertifier.com/how-to-integrate-sertifier-and-pabbly-connect#main-content)
[Create Support Ticket](https://help.sertifier.com/kb-tickets/new?hsLang=en)
[](https://help.sertifier.com/?hsLang=en)
- [Create Support Ticket](https://help.sertifier.com/migration/kb-tickets/new)
- [FAQ](https://help.sertifier.com/faq)
Open main navigation
Close main navigation
- [Create Support Ticket](https://help.sertifier.com/migration/kb-tickets/new)
- [FAQ](https://help.sertifier.com/faq)
- [Create Support Ticket](https://help.sertifier.com/kb-tickets/new)
- [Login](https://app.sertifier.com/en/login)
[Login](https://app.sertifier.com/en/login)
How can we help you?
- There are no suggestions because the search field is empty.
1. [Help Center](https://help.sertifier.com/?hsLang=en)
2. [Integrations](https://help.sertifier.com/integrations?hsLang=en)
3. [Pabbly Connect](https://help.sertifier.com/integrations?hsLang=en#pabbly-connect)
# How to Integrate Sertifier and Pabbly Connect
## (Example integration with Google Sheets) A few step guide on how to Integrate Sertifier and Google Sheets on Pabbly Connect.
#### **Preparation Step: Sertifier**
To begin, navigate to the "Advanced" section and select the "Integrations" tab from the menu on the left. Within the Integrations tab, proceed by clicking on "Create New Integration."
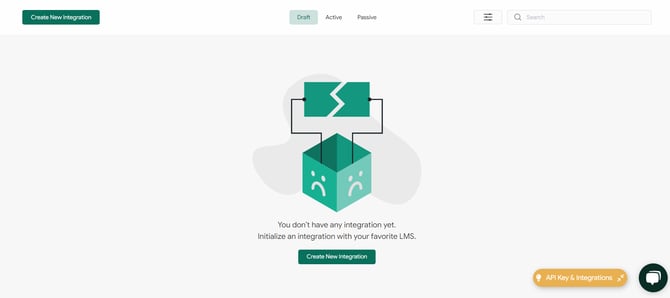
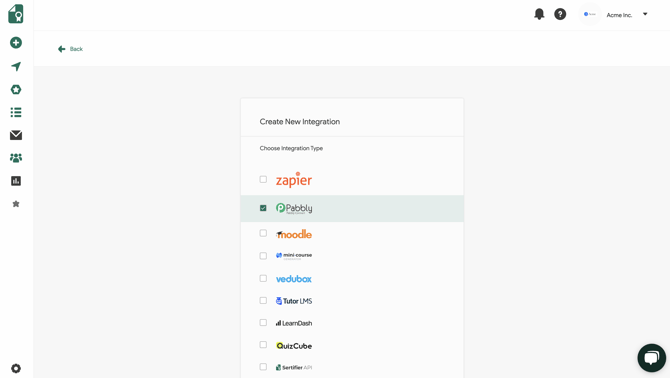
After selecting "Create New Integration," a list of integrations will appear. Choose Pabbly Connect from the list to proceed. Upon clicking Create New Integration, you will be directed to the credential campaign page where you can select or create the components of the credential which are the Design, Detail and the Email Template.
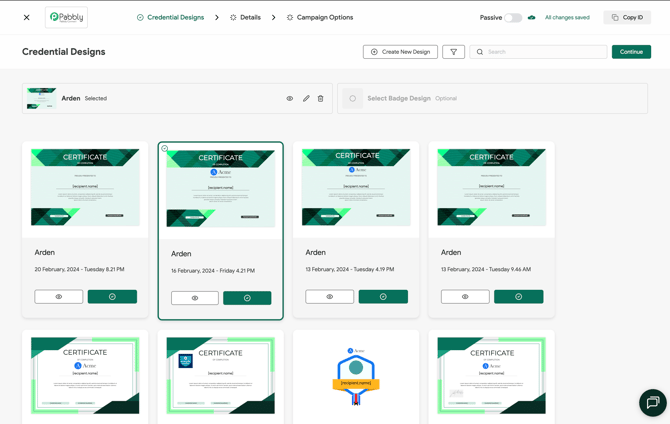
***Design Credential***
Click the green checkmark next to the credential design to select your preferred design. If you do not have a design yet, you can click on **Create New Design** to access the Credential Designer. You can [click here](https://help.sertifier.com/how-to-design-a-certificate?hsLang=en) for more detailed information about the Credential Designer.
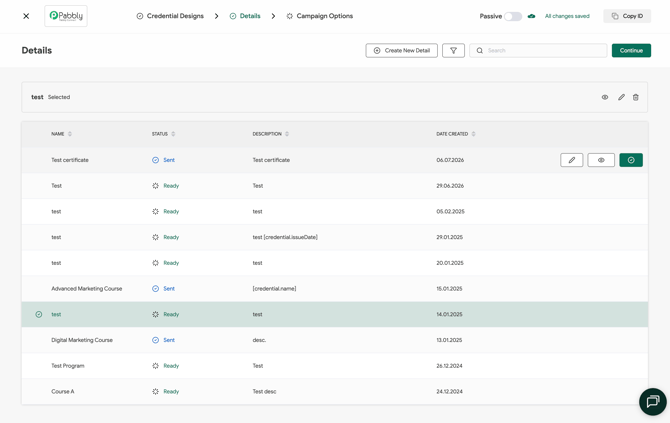
**Creating Details**
Click the green checkmark to select one of your existing credential details, or click **Create New Detail** to create a new one.
The Credential Details page is where you can input all the essential information for your digital credentials. This section enables you to complete the necessary details for your certificates. [Click here](https://help.sertifier.com/credential-details-complete-guide?hsLang=en) for more detailed information on how to create certificate details.
**Campaign Options**
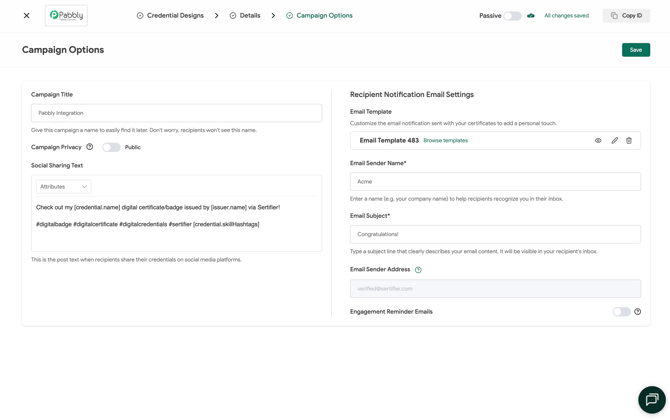
In the **Campaign Options** step, you can customize the Campaign Title, as well as the Social Sharing Text.
Under **Recipient Notification Email Settings**, you will be able to select or create a new custom email template to issue your credentials with by clicking **Browse Templates**.
***Email Template***
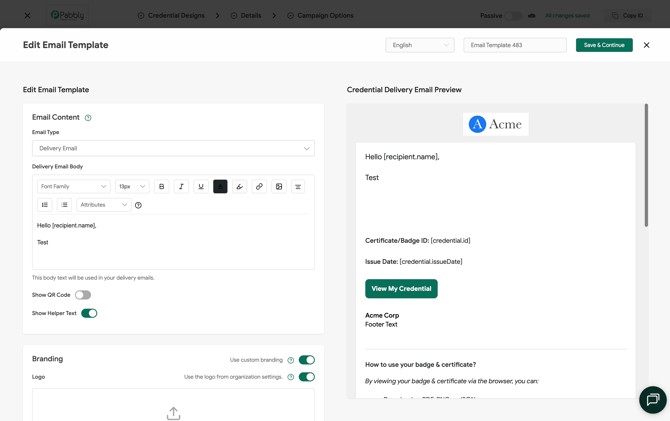
The Email Template tab is where you can customize the email that will be sent to your certificate recipients.
You can find more detailed information [here](https://help.sertifier.com/how-to-create-a-email?hsLang=en).
****
For a complete guide to sending Digital Credentials, you can [click here](https://help.sertifier.com/credentials-complete-guide?hsLang=en).
Once all components are selected and saved, toggle the status of your integrated campaign to **Active**, indicating that the credential is now fully prepared for integration.
**Preparation Step: Google Sheets**
Create a Google Sheets as you wish, but do not forget to add three questions: “First and Last Name", “Email Address” and "Issue Date". That’s it! If you are planning to add more variables to your credentials, please add them to the sheet. For example, if you are going to create a custom variable, you need to create and define a column for it.
#### **Integration On Pabbly Connect**
Access your Pabbly Connect account. Locate the "Create Workflow" button on the upper-right corner of the dashboard, click on it and name your workflow.
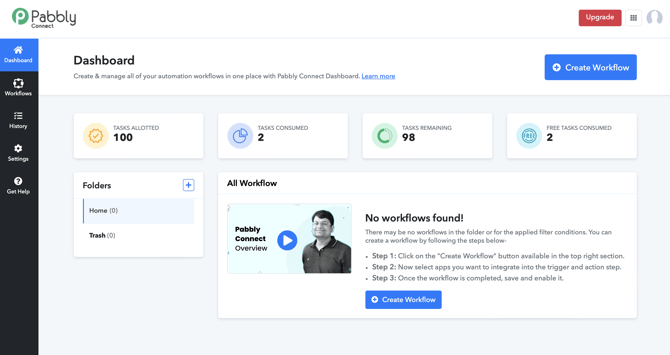Once you access the workflow editor, you can begin configuring your integration.
#### **Integration Step: Google Sheets**
Click Trigger within the editor and choose Google Sheets. Once you select your integration, choose **New or Updated Spreadsheet Row** as your trigger event. Then, follow the steps to set up your web hook.
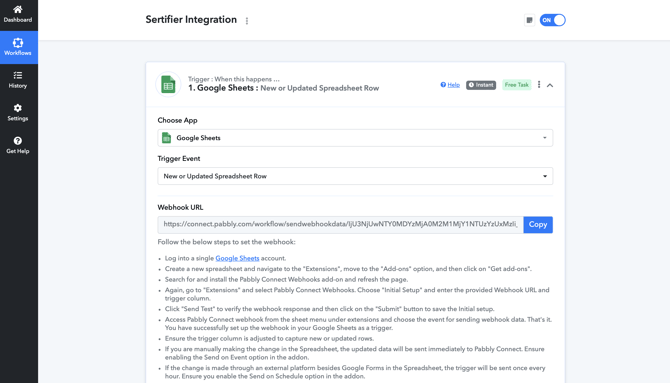
After setting up your web hook, ensure to click on **Capture Webhook Response** and enter data into your Google Sheet to test the trigger. If the trigger is configured correctly, you should observe the responses being received.
#### **Integration Step: Sertifier**
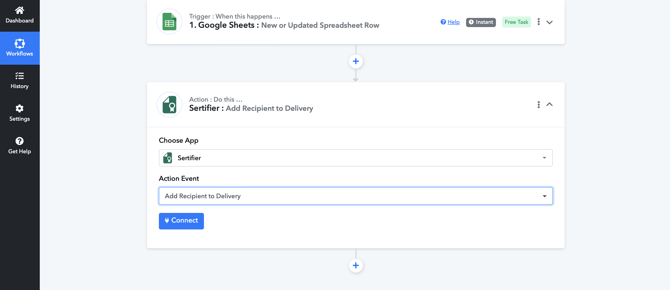
The **Action** part also has a section for choosing an app and event. Type “Sertifier” into the search box and click on our logo below.
Choose the **Add Recipient to Delivery** event to automatically issue credentials.
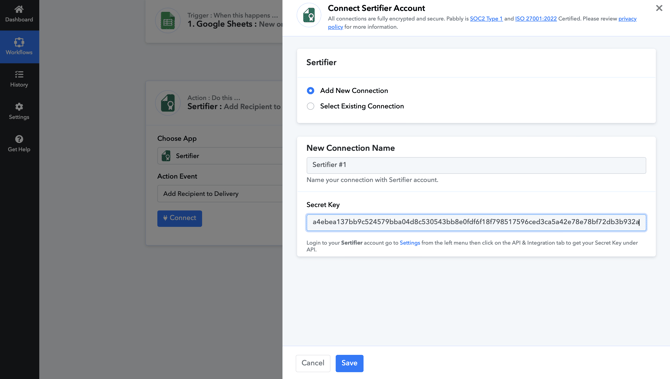
Now you need to select the **Add New Connection** and type in your Sertifier API Key. You can find your API key in your Sertifier account under **Settings \> API & Integrations**.

Once you type in your API Key, click **Save** to continue.
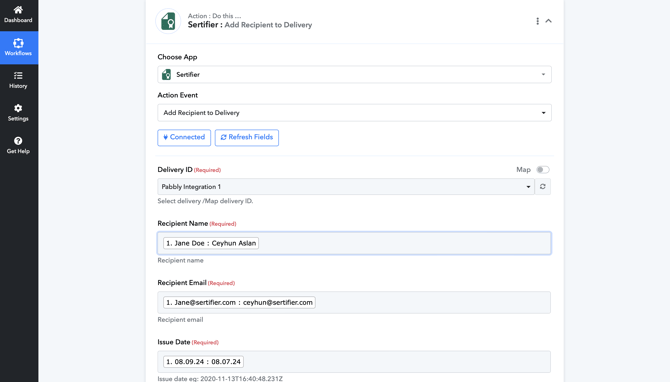
Once your connection to your Sertifier account is established, choose the Credential Campaign you created from the **Integrations** tab and in the **Delivery ID** field. Select the appropriate answers for each required field (**Recipient Name, Recipient Email, Issue Date)** in order to accurately link your data. If there are any additional attributes, be sure to also map them accordingly.
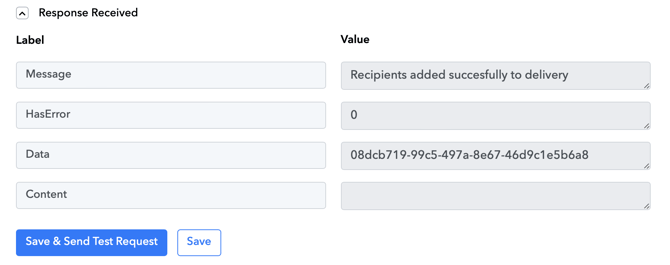
Once you've mapped your data, simply click on **Save & Test Request** to give your workflow a test run. If everything is configured correctly, you should see the message **Response Received** without any errors. Congratulations on successfully completing the setup of your Pabbly Connect integration!
- [Get Started](https://help.sertifier.com/get-started?hsLang=en#main-content)
- [Your Subscription](https://help.sertifier.com/get-started?hsLang=en#your-subscription)
- [Create & Send Credentials](https://help.sertifier.com/get-started?hsLang=en#create-send-credentials)
- [Track Your Credentials](https://help.sertifier.com/get-started?hsLang=en#track-your-credentials)
- [Connect](https://help.sertifier.com/get-started?hsLang=en#connect)
- [Account Management](https://help.sertifier.com/account-management?hsLang=en#main-content)
- [Organization Settings](https://help.sertifier.com/account-management?hsLang=en#organization-settings)
- [Subscriptions](https://help.sertifier.com/account-management?hsLang=en#subscriptions)
- [Credential Website](https://help.sertifier.com/account-management?hsLang=en#credential-website)
- [Plans & Payment](https://help.sertifier.com/account-management?hsLang=en#plans-payment)
- [Analytics](https://help.sertifier.com/account-management?hsLang=en#analytics)
- [Privacy](https://help.sertifier.com/account-management?hsLang=en#privacy)
- [Utilizing Your Credentials](https://help.sertifier.com/utilizing-your-credentials?hsLang=en#main-content)
- [Verifying and Managing Your Credentials](https://help.sertifier.com/utilizing-your-credentials?hsLang=en#verifying-and-managing-your-credentials)
- [Sharing and Displaying Your Credentials](https://help.sertifier.com/utilizing-your-credentials?hsLang=en#sharing-and-displaying-your-credentials)
- [Using and Customizing Verified Wallet](https://help.sertifier.com/utilizing-your-credentials?hsLang=en#using-and-customizing-verified-wallet)
- [General Recipient FAQs](https://help.sertifier.com/utilizing-your-credentials?hsLang=en#general-recipient-faqs)
- [Generate Digital Credentials](https://help.sertifier.com/generate-digital-credentials?hsLang=en#main-content)
- [Create, Edit and Send Credentials](https://help.sertifier.com/generate-digital-credentials?hsLang=en#create-edit-and-send-credentials)
- [Credential Design](https://help.sertifier.com/generate-digital-credentials?hsLang=en#credential-design)
- [Credential Details](https://help.sertifier.com/generate-digital-credentials?hsLang=en#credential-details)
- [Email Templates](https://help.sertifier.com/generate-digital-credentials?hsLang=en#email-templates)
- [Recipients](https://help.sertifier.com/generate-digital-credentials?hsLang=en#recipients)
- [Attributes](https://help.sertifier.com/generate-digital-credentials?hsLang=en#attributes)
- [Collections](https://help.sertifier.com/generate-digital-credentials?hsLang=en#collections)
- [Pathways](https://help.sertifier.com/generate-digital-credentials?hsLang=en#pathways)
- [Integrations](https://help.sertifier.com/integrations?hsLang=en#main-content)
- [REST API](https://help.sertifier.com/integrations?hsLang=en#rest-api)
- [SSO](https://help.sertifier.com/integrations?hsLang=en#sso)
- [Zapier](https://help.sertifier.com/integrations?hsLang=en#zapier)
- [Zoom](https://help.sertifier.com/integrations?hsLang=en#zoom)
- [Canvas](https://help.sertifier.com/integrations?hsLang=en#canvas)
- [Moodle](https://help.sertifier.com/integrations?hsLang=en#moodle)
- [Mini Course Generator](https://help.sertifier.com/integrations?hsLang=en#mini-course-generator)
- [Thinkific](https://help.sertifier.com/integrations?hsLang=en#thinkific)
- [Tutor LMS](https://help.sertifier.com/integrations?hsLang=en#tutor-lms)
- [LearnDash](https://help.sertifier.com/integrations?hsLang=en#learndash)
- [Adobe Learning Manager](https://help.sertifier.com/integrations?hsLang=en#adobe-learning-manager)
- [Degreed](https://help.sertifier.com/integrations?hsLang=en#degreed)
- [RingCentral](https://help.sertifier.com/integrations?hsLang=en#ringcentral)
- [Absorb LMS](https://help.sertifier.com/integrations?hsLang=en#absorb-lms)
- [Pabbly Connect](https://help.sertifier.com/integrations?hsLang=en#pabbly-connect)
- [GoHighLevel](https://help.sertifier.com/integrations?hsLang=en#gohighlevel)
- [Enocta](https://help.sertifier.com/integrations?hsLang=en#enocta)
- [N8N](https://help.sertifier.com/integrations?hsLang=en#n8n)
- [Make](https://help.sertifier.com/integrations?hsLang=en#make)
- [TypeForm](https://help.sertifier.com/integrations?hsLang=en#typeform)
- [Salesforce](https://help.sertifier.com/integrations?hsLang=en#salesforce)
- [Europass](https://help.sertifier.com/integrations?hsLang=en#europass)
- [FAQ](https://help.sertifier.com/faq?hsLang=en#main-content)
- [Issuing Digital Credentials](https://help.sertifier.com/faq?hsLang=en#issuing-digital-credentials)
[](https://sertifier.com/?hsLang=en)
Copyright © 2025, Sertifier