Sertifier + Degreed Integration
Connect your Degreed account & issue credentials automatically through Sertifier.
Connect Your Account To Sertifier
To connect your Degreed account to Sertifier, first, you need to provide your client ID and client secret key.
You can obtain API keys (Client ID and Client Secret credentials) using the administrator's dashboard or by contacting your Degreed Technical Solutions Specialist. Please contact Degreed for further information.
As you provide this information, your integration will turn automatically Active.
Create Your Credential Campaign
Now that you are connected, follow the below steps to create your credential campaign.
*Go to the Advanced > Integrations tab from the left menu on Sertifier.
*Click Create New Integration from the top left corner.
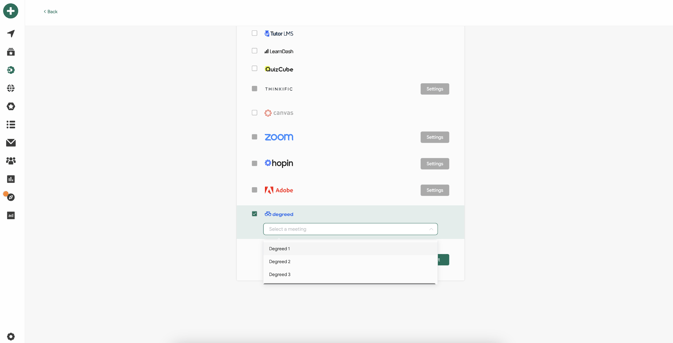
*Select Degreed from the integrations, and choose the related pathway on Degreed.
*Proceed with creating the credential details, credential design, and email template.

Credential Detail
The detail page is where you input the information for your digital credentials.
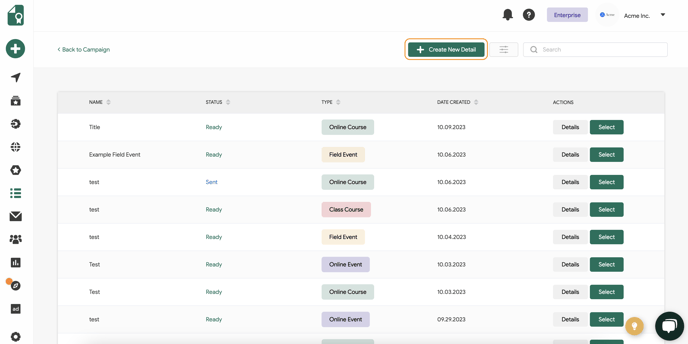
Within the credential campaign flow, click on Select Detail, and then proceed by clicking the Create New Detail button.

1.Fill in the Credential Title
Begin by entering the title for your credential. This title will serve as the primary identifier and should clearly reflect the nature of the credential being issued.
2.Fill in the Credential Description
Next, provide a detailed description for the credential. This description should convey the purpose, significance, and any pertinent details about the credential to help recipients understand its value and relevance.

3.Add Relevant Skills
- Search for Existing Skills: Utilize relevant keywords associated with the credential to search for skills within our database. When you add a skill, related skills will also become accessible, offering you additional options that may be pertinent to your credential.

- AI Generated Skill Suggestions: Our AI bot will automatically suggest relevant skills based on the title and description you’ve provided.

- Add Custom Skills: If you cannot find a suitable skill, you have the option to add a custom skill. Simply type the desired skill into the search bar. If the skill does not appear in the suggestions, scroll to the bottom of the list and click on the option to add a custom skill.

 4.Choose Optional Fields
After adding the necessary details and skills, you can choose to include any optional fields in your credential. These optional fields allow you to further customize the credential to fit your specific needs and requirements.
The optional fields you can add to your credential detail includes: Credential Type, Duration, Cost, Level, Earning Criteria, Expiry Date, and Supporting Documents.
Credential Design
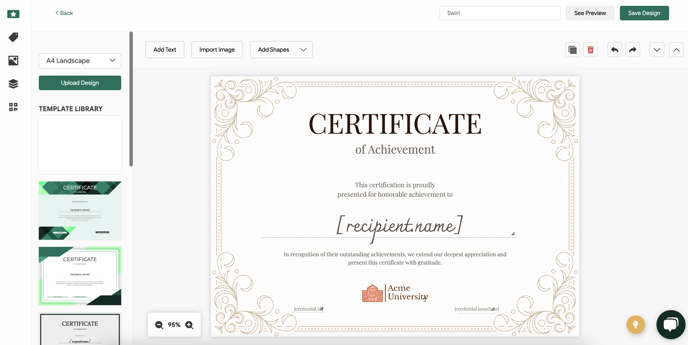
Within the credential campaign, click either the Select Badge Design or "Select Certificate Design" option, or create both of them under the same campaign. Then, select Create New Design to customize your credential design.
For more details on further customizing your credentials, click here.

Once you've finished customizing your credential design, save it, and then continue with your campaign with the email step.
Email Template
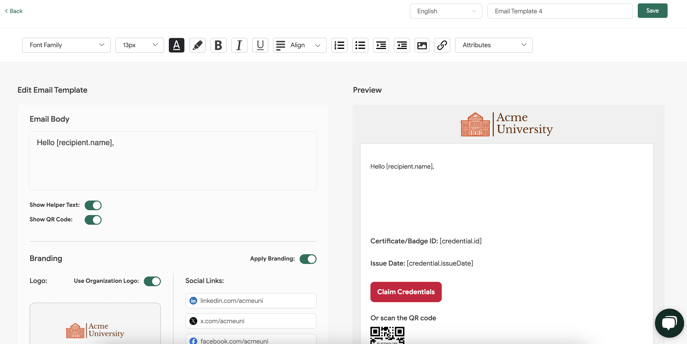
Proceed with the Email Template, and click the Create New Email button. The Email Template tab is where you create and customize the email you'll be sending the credentials to your recipients. Here, you have the flexibility to personalize your email according to your preferences.
For more detailed information, please refer to this help article.
Recipients
Your recipients will be retrieved automatically as they complete pathways on Degreed.
If you need further help with setting up the integration, feel free to reach us at support@sertifier.com.
