To begin adding recipients to your account, start by selecting the Recipients option from the left-hand menu.
Add Recipients
To add recipients, navigate to the Recipients tab.
From the Add Recipients button, you have the option to manually create a recipient by utilizing the Add Single Recipient button or in bulk using the Upload Spreadsheet button.
Upload Recipients
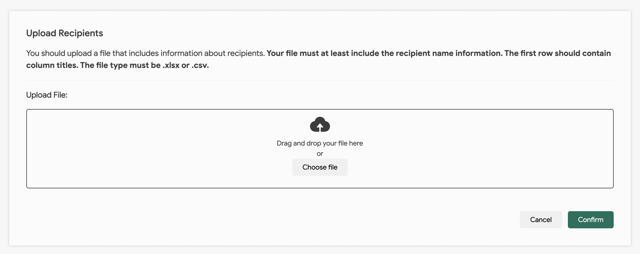
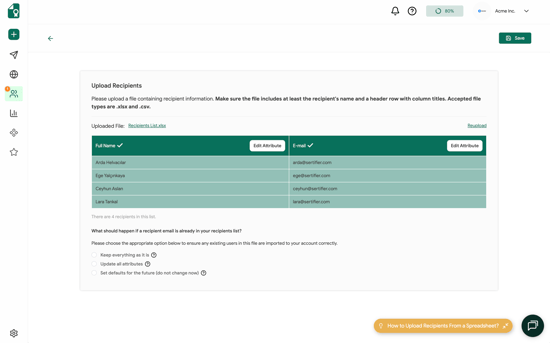
Once you have uploaded your Excel file, simply save it after aligning your attributes and columns. Remember, the column names do not necessarily have to match the attributes - just ensure they are correctly associated.

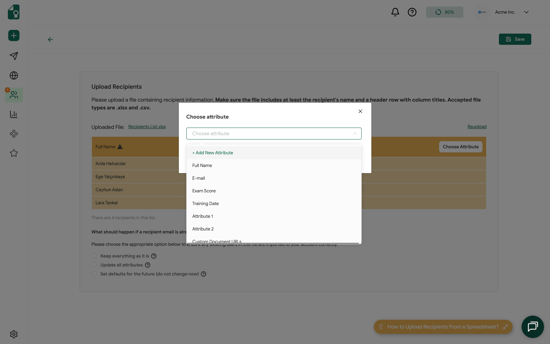
- Keep everything as it is
- Example: You upload john@sertifier.com with Course Title = Sertifier Expert. The attribute in the system remains as Sertifier Usage 101 and does not change.
- Update custom attributes only
- Example: You change john@sertifier.com’s Course Title from Sertifier Usage 101 to Sertifier Expert. All past, current, and future credentials linked to this email now show Sertifier Expert. System attributes like Issue Date or Expiry Date remain unchanged.
- Set defaults for the future (do not change now)
- Example: You upload john@sertifier.com with Course Title = Sertifier Expert. Current attributes stay the same. For future credentials, Course Title will auto-fill as Sertifier Expert if the field is left blank.
Add Single Recipient
To manually add a recipient, simply click on the Add Single Recipient option.
You can enter the recipient's name, email address, and any other relevant attributes that you wish to associate with them.
You also have the flexibility to create a recipient without providing an email address.

Related Article: What Is Recipients?