Existing attributes can be added to your certificates from the Attributes section.
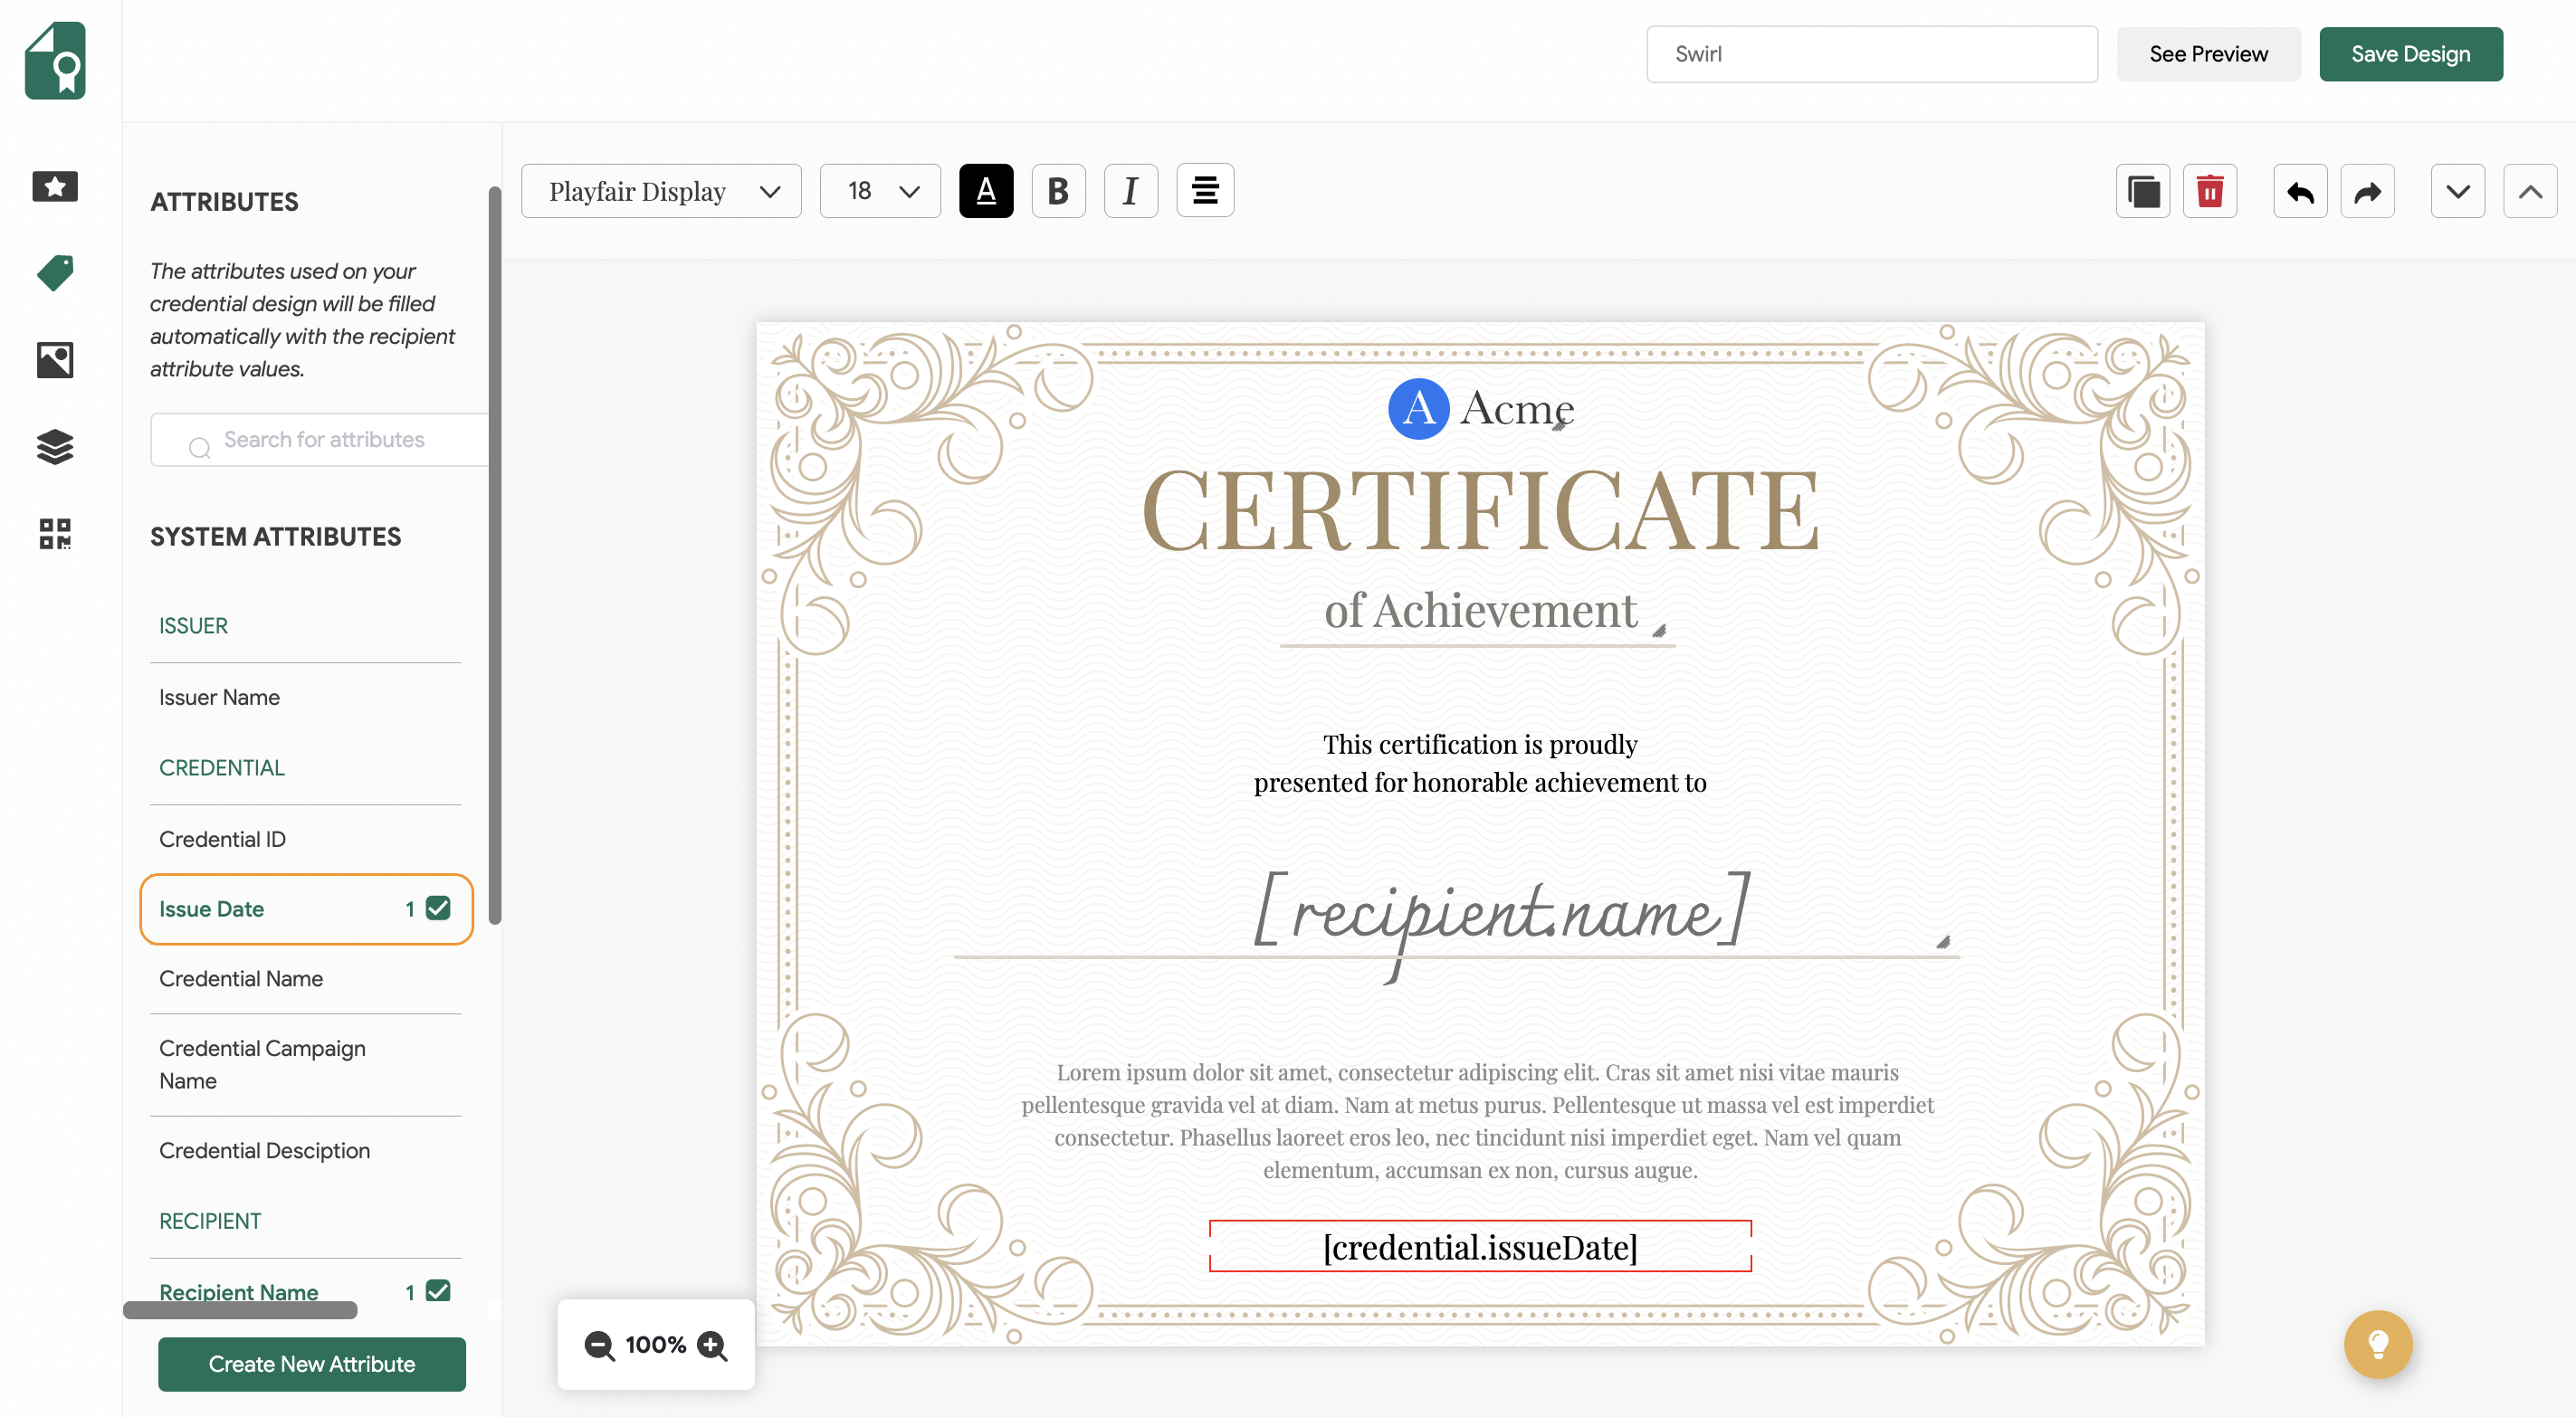
To include the Issue Date on your certificate, simply access the Attributes tab located on the left side of the credential design page. Click on the Issue Date attribute within this tab. After adding it, you have the option to customize its color, position, and size. The Issue Date details are automatically populated based on the date the certificate was sent.
You can also include the Issue Date attribute in your credential details or within your email templates.
Editing the issue date on an already-issued credential
If a credential has already been sent and you need to correct or update the issue date for a specific recipient, you can edit it manually:
- Navigate to the Credentials tab from the left menu.
- Find and click Edit on the relevant credential campaign.
- From the Recipients section, find the recipient whose issue date you need to change.
- Click the Edit icon for the recipient you want to update.
- Update the issue date field to the correct date.
- Save the changes.
If you need to update issue dates for multiple recipients at once, you can also use an Excel file. Upload the recipient list with the revised issue dates and choose the Update This Campaign Only option.
This update changes the issue date shown on the recipient’s credential verification page. The recipient will be notified of this change automatically, unless you disable the Update Notification Email under Organization Settings > Account Preferences.