How to Create And Use Custom Attributes
Creating Custom Attributes for your certificates is a valuable feature that allows for personalization and customization.
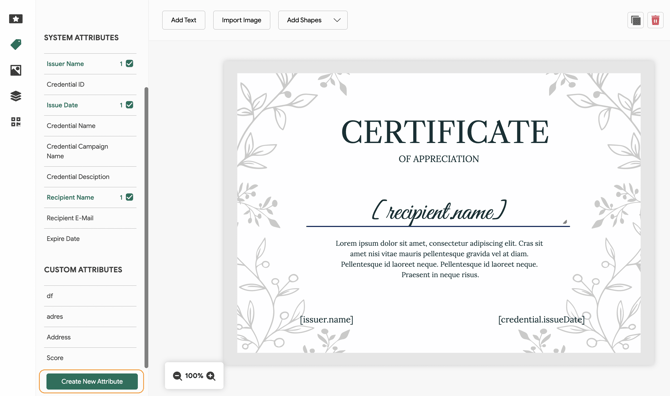
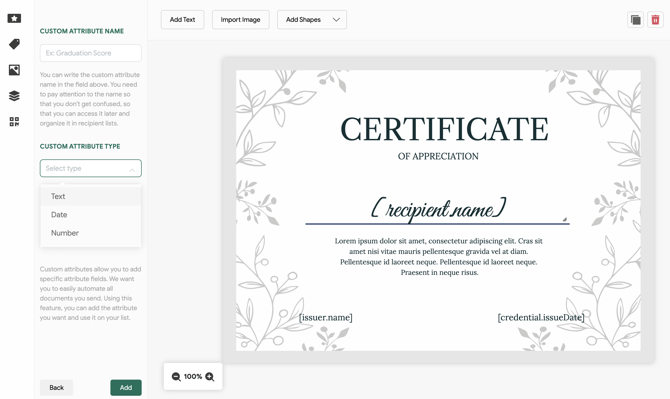
To set up a Custom Attribute, navigate to the Attributes section within the credential designer. From there, you can create it by selecting the Create Custom Attribute button located at the bottom of the tab. Upon clicking on the button, you can designate a name for your attribute and select the attribute type, such as text, date, or number. After entering the attribute details, simply click on the Add button to incorporate it into your certificate design. You have the flexibility to adjust the color, size, and placement of the attribute to suit your preferences.

Additionally, you have the option to create a custom attribute directly from the Credential Details or within Email Templates.
Credential Details
To create a custom attribute within the Credential Details section, click on the Attributes dropdown menu located in the Credential Description area. From there, select the option labeled Create New Attribute at the bottom of the list.

Email Templates
To create a custom attribute within the Email Templates section, click on the Attributes dropdown menu located in the Email Body area. From there, select the option labeled Create New Attribute at the bottom of the list.

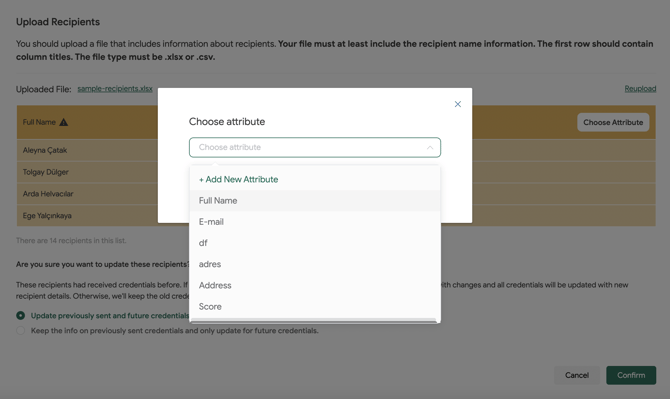
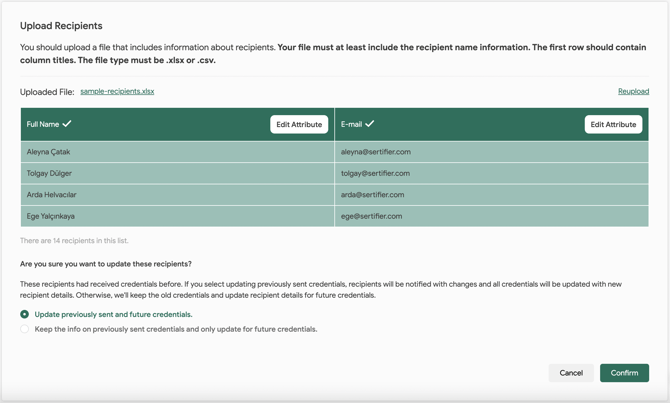
The custom attribute information is automatically sourced from the attributes you matched during recipient upload in the Recipients section.

After uploading your recipient file, ensure that you match the custom attribute you have created.
Related Articles: What Are Attributes and How Are They Used?